Building a radio-controlled glider is a fun project! First, let’s gather lightweight materials like foam board for the body and balsa wood for the ribs. We’ll select compatible electronics, ensuring smooth motor control and good battery life. Control surfaces like elevons need precise linkages, so we’ll secure servos properly. Finally, we must balance the glider by placing the battery near the center of gravity. Stick around; there’s plenty more to learn about making your glider fly!
Key Takeaways
- Select lightweight materials, such as foam board and balsa wood, for the glider’s wings and fuselage to enhance performance and maneuverability.
- Ensure compatibility between your receiver and transmitter, and connect the ESC wiring correctly for optimal motor control.
- Assemble control surfaces like elevons and ruddervators with precise linkage using control rods or fishing lines for responsive flight.
- Position the center of gravity (CG) between 25-30% of the wing’s chord for stability, adjusting balance with small weights as needed.
- Incorporate a six-axis gyro stabilizer for beginners to improve flight stability and control during operation.
Materials and Basic Structure
When it comes to building a radio-controlled glider, choosing the right materials is like picking the perfect ingredients for a recipe. We can’t go wrong with foam board for the wings and fuselage. It’s lightweight and super easy to cut, making our lives much easier. For added strength, balsa wood is our go-to for ribs and spars. It’s lightweight yet tough—think of it as the protein in our glider diet!
We might also consider carbon fiber rods for reinforcement, especially in the wings. They stop things from bending—like our patience when waiting for glue to dry! Let’s not forget about adhesives: hot glue works wonders for foam since it’s foam-safe. Additionally, using lightweight EPP foam can enhance maneuverability and durability in our glider. With the right materials, we’re on track for a fantastic flight!
Recommended Products

-Efficient folding propeller, metal spinner and functional flaps

✔️ Only Electric Powered;With 1:1 plan for fuselage;wing and tail assembly;also with instruction manual inside the box;
Electronics Selection and Installation
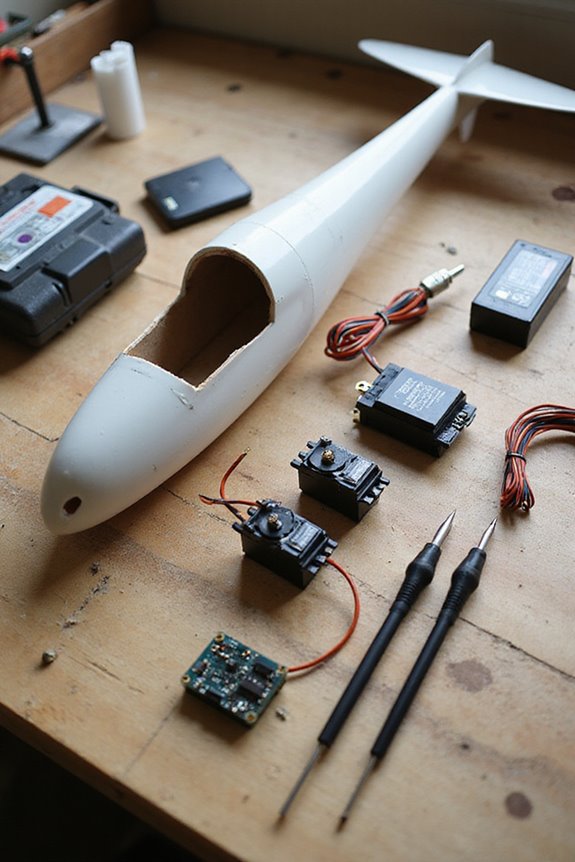
We’ve got our materials lined up, and now it’s time to get our glider flying with the right electronics. First off, let’s verify receiver compatibility with our transmitter. Most of us will want a transmitter that supports advanced features like model memory and programmable settings to keep our soaring adventures classic.
Next, we’ll tackle ESC wiring. Properly connecting our electronic speed controller means we can control the motor with precision. To avoid the dreaded signal interference, keep wires away from any high-power sources and consider adding capacitors near the receiver.
Lastly, don’t forget about power redundancy. Adding a second receiver can save the day if our primary one fails. Now, let’s find those perfect servos to complete the setup! Additionally, ensure you select a battery with a higher capacity to maximize airtime and improve overall flight performance.
Recommended Products
Perfect for All Skill Levels: Featuring the advanced Xpilot gyro stabilizer system and three levels of flight control assistance, this RC plane caters to both beginners and experts. Whether you're just starting out (with full assist for an easy, stable flight), progressing to intermediate skills (with partial assist for more control), or a seasoned pro (with full manual control for ultimate freedom), this plane ensures an exciting experience at every stage. Perfect for building confidence, mastering new skills, or showcasing your expertise from the start!

[Easy to Fly RC Plane] With Xpilot gyro stabilizer system, this stable, remote-controlled aircraft allows pilots to perform aerobatics and fly in light wind. An ideal RC airplane for grownups just starting out

Easy control: LEAMBE Airplane has a simple operation mode which only needs to press the switch and pull the stick to easily control the aerobatics of the aircraft. It can take off after you assemble the wheels, and it is also convenient to carry. Best outdoor games and toys for you
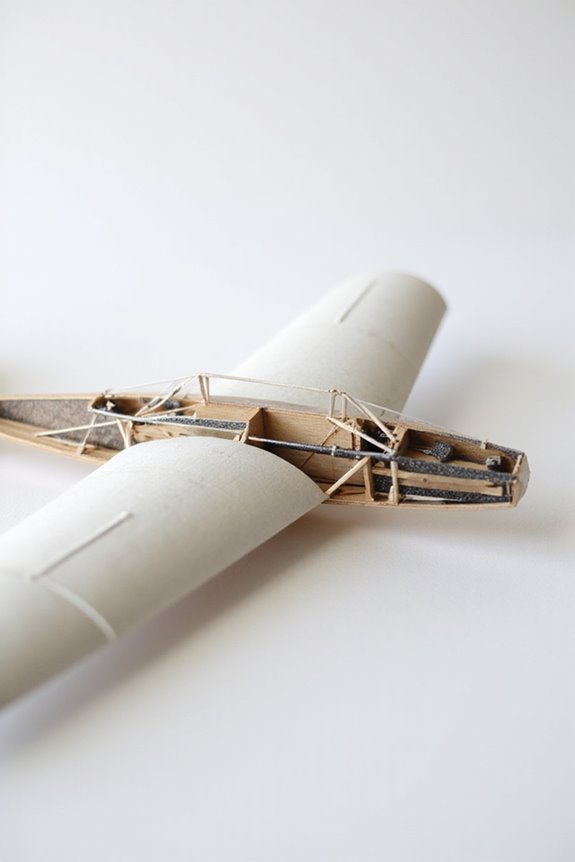
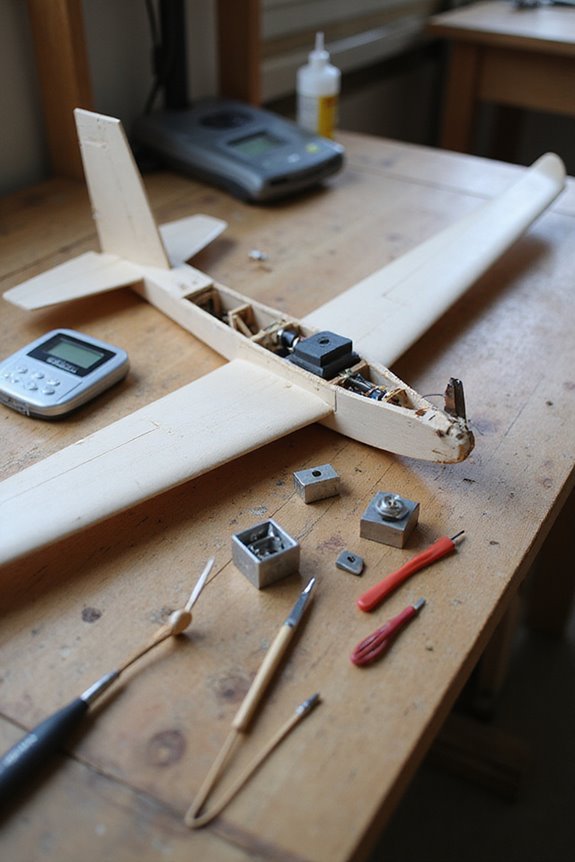
Control Surface Assembly and Linkage
As we plunge into control surface assembly and linkage, think of it like the nerves of our glider, taking commands from our transmitter and transforming them into smooth, graceful movements in the air. We’ll work with different control surface types, like elevons and ruddervators, to guarantee our glider dances in the sky.
Getting linkage accuracy is critical. We may use control rods or fishing lines to connect these surfaces to the servos. Aligning our control horns with the hinges keeps everything moving fluidly. Once it’s all together, we’ll glue down servos securely but leave room for future tweaks. With the right materials and careful assembly, our glider will respond perfectly, gliding gracefully with every command we send! Additionally, ensuring the use of high-quality materials in the construction of our control surfaces will enhance durability and performance.
Recommended Products

The pull rod set compatible with WLtoys 144001 1/14 RC car buggy.

【Lock on nylon control horns】 21x10 mm, designed with 4 holes, Easy to install, sturdy in flight.

【Lock on nylon control horns】 21x10 mm, designed with 4 holes, Easy to install, sturdy in flight.
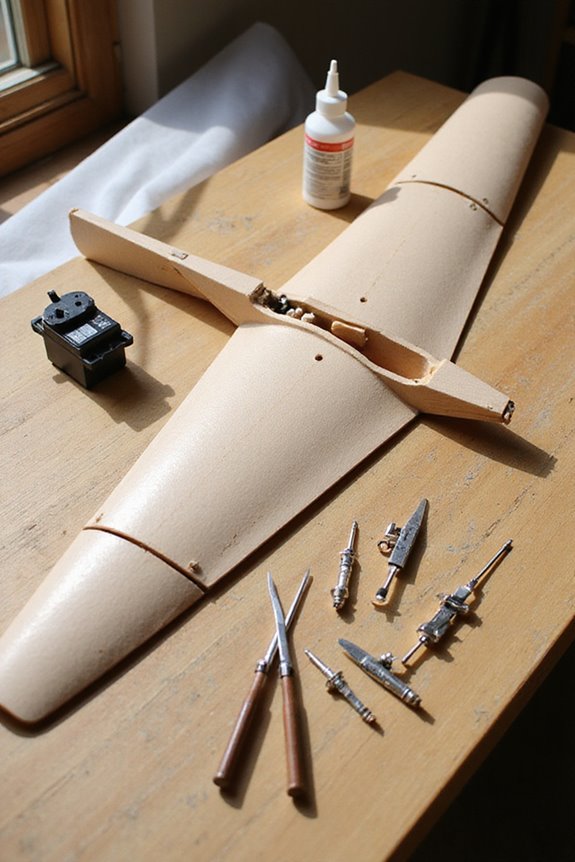
Structural Details and Strengthening

With our control surfaces ready to respond like a well-trained performer, it’s time to turn our attention to the backbone of our glider: its structure. We’re diving into composite materials like Kevlar and fiberglass. They offer strength without the heavyweight tag! This helps our glider stay nimble and efficient.
Structural reinforcements, such as carbon fiber, give us an edge by handling those pesky bending moments. Think of triangular and hexagonal shapes—strong but light, kind of like a superhero’s secret weapon! Balsa wood wings, paired with thin fiberglass sheeting, create a stressed-skin structure that flies under stress but stays solid in the air. Using these materials wisely means we’re building a glider that’s ready for the skies, not just a paper airplane! Additionally, Balsa Wood Airplane Kits provide simple construction and imaginative play, making them a great choice for beginners exploring aerodynamics.
Recommended Products

✔️Only Electric Powered;Need to assemble the kit;

Weight, Balance, and Flight Control
When we explore the world of weight, balance, and flight control, it’s easy to overlook how essential these elements are for our glider’s performance. The center of gravity (CG) should sit between 25-30% of the wing’s chord from the leading edge. This placement is critical for stable flight—think of it as our glider’s sweet spot.
Balancing techniques start by checking if the model is nose or tail heavy. Use small weights distributed along the tail instead of one heavy lump. Weighing down our glider can impact wing loading, so let’s minimize excess weight. Position the battery near the CG to dodge balance shifts mid-air. Remember, a well-balanced glider glides smoother and responds better. Additionally, incorporating a six-axis gyro stabilizer can significantly enhance flight stability, especially for beginners. Happy flying!
Recommended Products
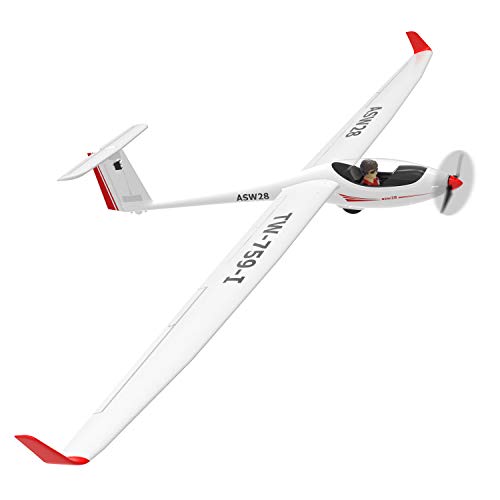
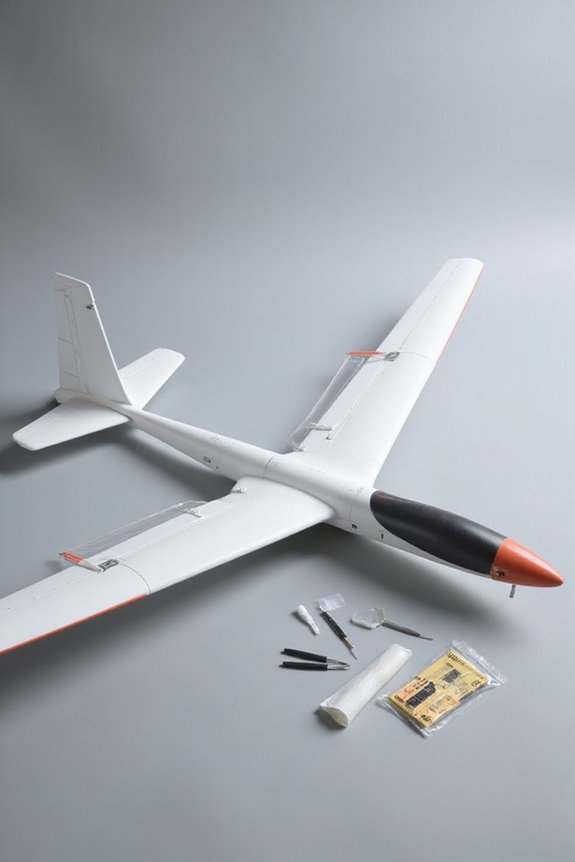
ASW28 gliders with 2.6m wings have good performance and povide a quick and easy way to experience the thrill of RC soaring or relax with a quick flight. The fuselage has the capacity for an FPV camera and related components.
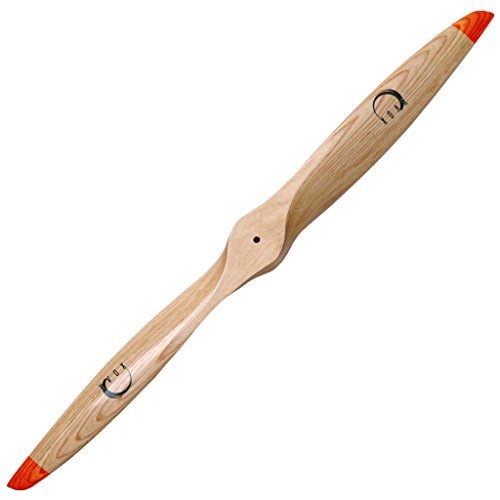
PREMIUM MATERIAL: Made of Premium Top Grade Plywood, each ply is no thicker than 1 mm and with the best combination of wood and glue. It is excellent for minimal elongation, breakpoint and distortion, therefore it is the best for making Wooden Model Airplane Propellers.

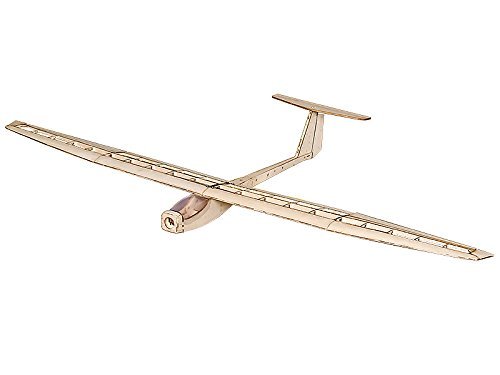
PhoenixS gliders with 1.6m wings have good performance and povide a quick and easy way to experience the thrill of RC soaring or relax with a quick flight. The fuselage has the capacity for an FPV camera and related components.
Frequently Asked Questions
What Tools Do I Need to Build a Glider?
When we think about glider assembly, we’ve got a few essential tools in mind. From cutting and shaping tools to fastening equipment, each one helps us create a well-crafted, functional glider together.
How Long Does It Take to Build an RC Glider?
When we consider building time for an RC glider, project duration varies greatly. Simple kits might take just a few hours, while detailed builds can extend to weeks, depending on complexity and our experience.
What Is the Best Paint for Foam Board Gliders?
Did you know over 70% of foam gliders are damaged by improper paint? We recommend using foam-safe paint and exploring airbrushing techniques; these methods guarantee a smooth finish and help preserve our creations’ integrity.
Can I Use Other Materials Besides Foam Board?
Yes, we can use materials like balsa wood for lightweight strength, carbon fiber for added stiffness, cardboard structures for budget-friendly prototypes, or plastic composites for durability, enhancing our builds and exploring various construction techniques together.
Where Can I Find Glider Plans or Designs?
When we’re on the hunt for glider plans, online resources abound—design templates galore! Whether we prefer free community guides or stored treasures, we’ll easily find something to inspire our next build adventure.