To maintain our RC plane’s covering, we should start with light cleanings after every flight, using diluted Simple Green. Let’s inspect for tears, bubbles, or fading, as these can affect performance—like a bad haircut! For any damage, we can trim and patch using matching materials, ensuring a snug fit with heat. Don’t forget to keep it in a climate-controlled space and cover it to shield from the sun. Stick around, and we’ll share some seasonal tips!
Key Takeaways
- Perform frequent light cleanings with a diluted Simple Green solution after every flight to keep the covering in good condition.
- Inspect for visible tears, bubbles, or wrinkles, and check adhesive strength and color fading regularly to ensure structural integrity.
- Use patches made from matching materials to repair any significant tears or damage, sealing edges properly with a sealing iron.
- Mist the covering with a 50/50 mix of rubbing alcohol and water before applying heat for shrinking and tightening in a controlled manner.
- Store your RC plane in a climate-controlled environment and cover it with dust protection to shield from UV rays and environmental damage.
Cleaning Routine for Covering Maintenance
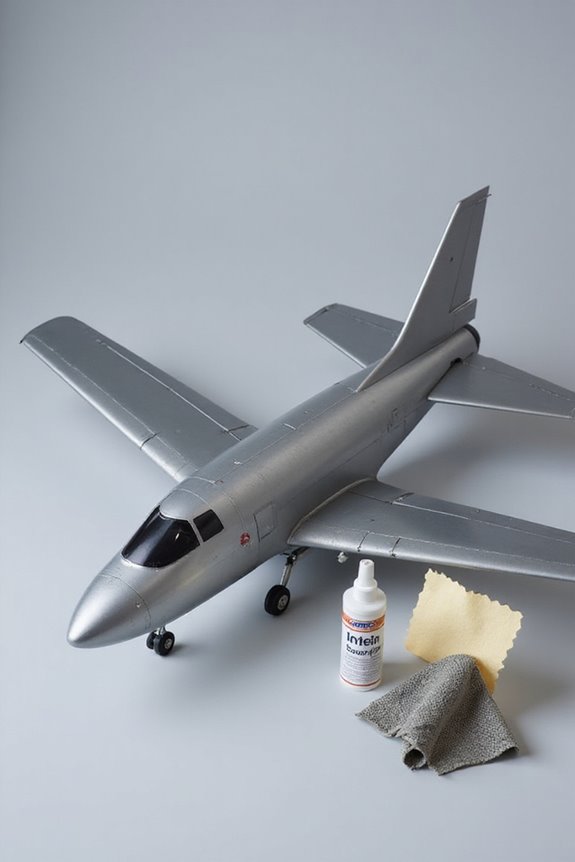
When it comes to keeping our RC planes in tip-top shape, a solid cleaning routine is key. We should aim for frequent light cleanings after every flight. This helps us remove grass, dirt, and grime that could harm our coverings. Our cleaning techniques can include using a diluted Simple Green solution for general cleaning or a homemade mix for tough residues.
Utilizing compressed air to blast away loose debris first is also a smart tactic. Remember to use soft microfiber cloths to avoid scratches; nobody wants that! By regularly maintaining our planes, we extend the life and beauty of their coverings. Let’s track our cleaning frequency, and we’ll keep our planes looking fly—and ready for the next adventure!
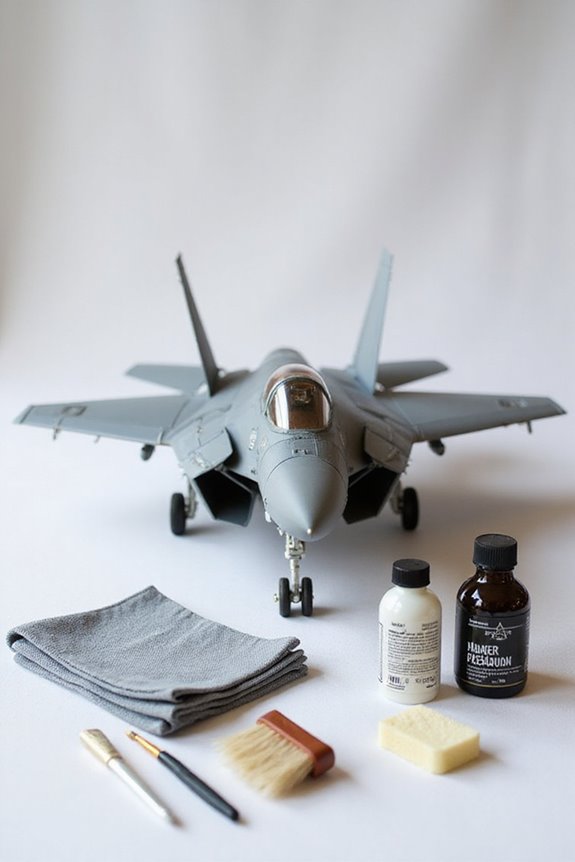
Inspecting the Covering
Before we take to the skies again, we should give our RC plane’s covering a thorough inspection. First up, let’s do a damage assessment. We check for visible tears, bubbles, or wrinkles that could ruin our flight. We also want to make sure that the structure is sound—hinges and dowels need to be in tip-top shape!
Next, we’ll look into adhesive evaluation. Adhesives should be firmly in place; peeling or weak areas can lead to serious flight issues. We can’t forget to watch for color fading, which signals sun exposure. And, let’s check for deformations, too—these can mess with aerodynamics. By catching these problems early, we’ll keep our planes flying high and looking sharp. Additionally, it’s important to remember that high tensile strength in the covering material can significantly enhance durability and performance.
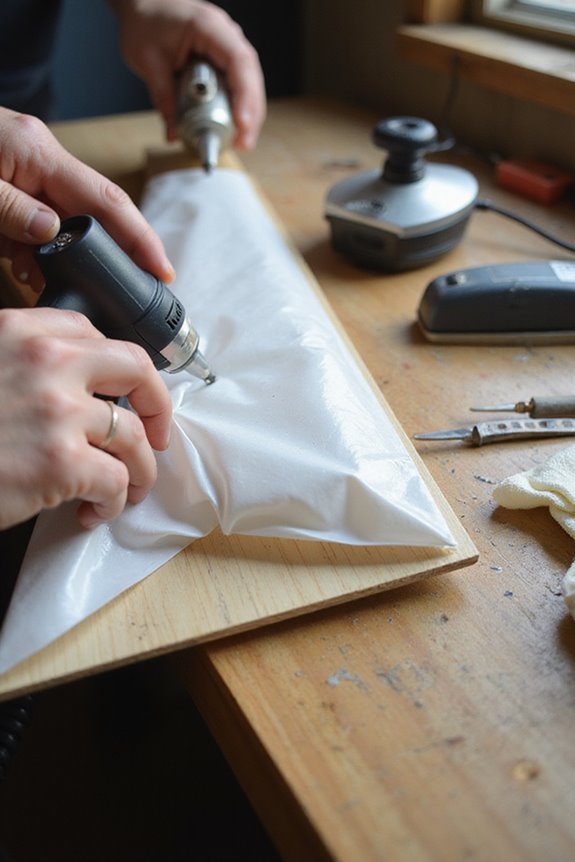
Repairing Loose or Damaged Covering

As we gear up to fix any loose or damaged covering on our RC planes, it’s essential to roll up our sleeves and tackle the repairs correctly. First, let’s trim those loose edges and clean the area—like prepping a canvas for a masterpiece. If we’ve got a big tear, we might need to remove the damaged piece entirely.
Next, we’ll grab some patch materials, like matching monokote or shrink film. We want our patch to be at least 1/4 inch bigger than the hole. Aligning the patch with the original covering’s grain is vital for good adhesion. A sealing iron will be our best buddy here, applying even pressure to seal those edges smoothly. Let’s make those repairs last! Additionally, using lightweight and portable options for the covering can enhance the overall performance of your RC plane.
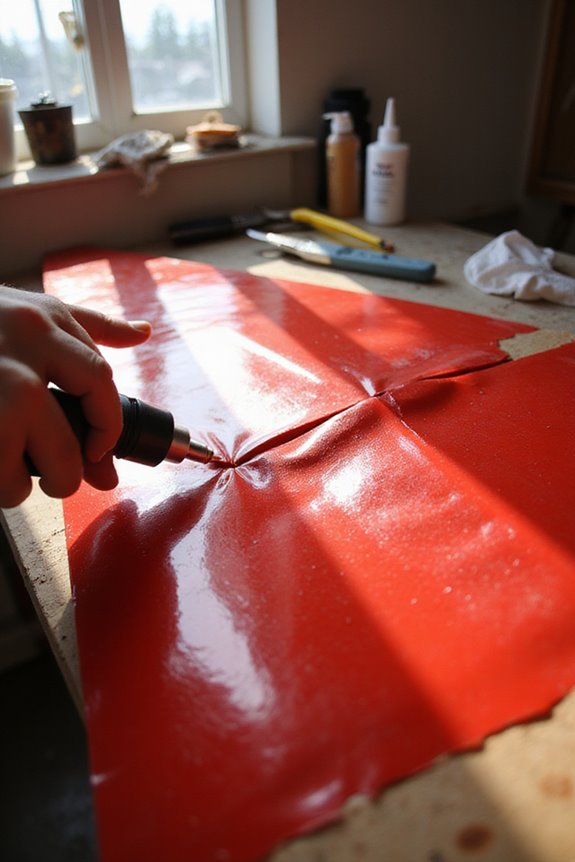
Shrinking and Tightening the Covering
Getting our RC plane’s covering to fit just right can feel like trying to put socks on a chicken—tricky but totally worth it! We can use several covering techniques to achieve that perfect fit. For instance, misting our covering with a 50/50 mix of rubbing alcohol and water helps it shrink smoothly over the model. It’s like giving our plane a nice spa treatment!
If we prefer heat, using a modeling iron or a heat gun can do the trick too. Just remember, patience is key! We need to work in sections, applying even heat. And for those tight spots? Don’t forget our trusty tools like dowel rods or spatulas to guarantee every wrinkle gets the love it deserves!
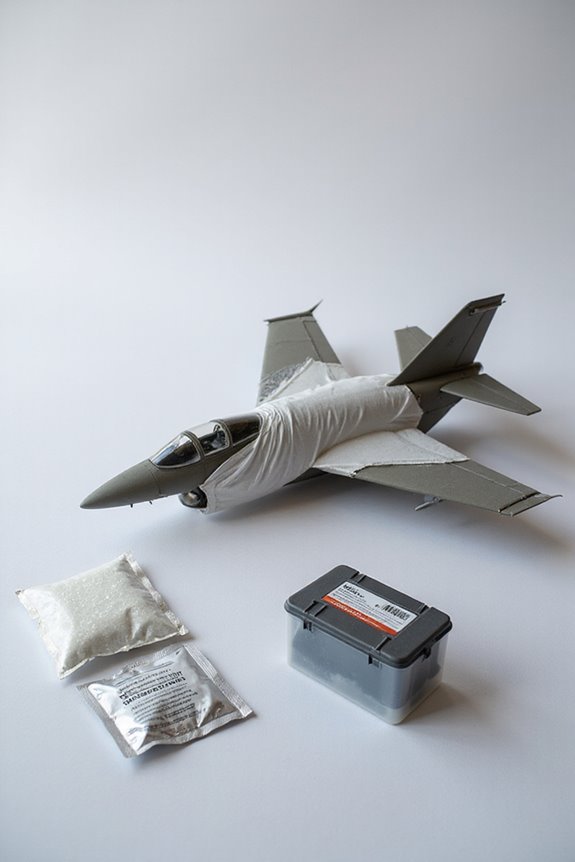
Preventive Measures for Longevity

While we all love to see our RC planes take to the skies, proper care and maintenance can make a world of difference in their longevity. One key step is cleaning—removing fuel, oil, and dirt as soon as possible keeps our covering intact. We should inspect for tears or loose seams after every flight, catching problems before they balloon into disasters.
Storage solutions matter too! We should keep our planes in a climate-controlled environment, ideally between 60–75°F, to avoid adhesive drama. A model stand prevents ground damage, kind of like a mini throne for our aircraft. Finally, covering our planes with a protective dust cover helps shield them from pesky weather conditions and UV rays, extending their lifespan and our flying fun! Additionally, using durable materials for the covering can significantly enhance resistance against wear and tear during flights.
Preparing for Different Seasons
Preparing our RC planes for different seasons is essential, especially if we want them to perform at their best. As we shift between the seasons, we should keep an eye on our plane’s covering. After winter, let’s inspect for any cracks or peeling caused by cold storage. Summer brings heat, so we must check for signs of heat stress and guarantee our electronics stay cool.
When fall rolls around, checking adhesives and adding moisture protection is key. Finally, during winter storage, a climate-controlled environment is a must. By addressing these seasonal shifts and their weather impact, we keep our planes in top shape, ready for any flying adventure. After all, a well-maintained plane is a happy plane! Additionally, using durable materials can greatly enhance the resilience of your aircraft against seasonal changes.
Frequently Asked Questions
How Often Should I Check My RC Plane’s Covering?
We should check our RC plane’s covering for durability regularly, especially after each flight. The maintenance frequency increases with usage and exposure to harsh conditions, ensuring we catch any issues before they become problematic.
What Tools Do I Need for Covering Maintenance?
Did you know that almost 60% of RC plane enthusiasts prioritize covering maintenance? We recommend essential tools like heat guns, sealing irons, and a variety of covering types for effective maintenance tips and repairs.
Can I Use Different Covering Materials Together?
Yes, we can use different covering materials together, but we need to evaluate covering compatibility and material performance. Mixing materials might enhance aesthetics but can affect weight distribution and overall efficiency of our RC planes.
How Do Temperature Changes Affect Covering Performance?
We once noticed covering shrinkage when our plane sat in the sun too long. Temperature effects can lead to issues like bubbles and damages, so being mindful of temperature during use is essential for maintaining our covering’s performance.
What Should I Do if I Find a Serious Cover Issue?
If we find a serious cover issue, we should consider repair techniques like gluing, ironing, or seam repairs. Identifying the covering types helps us choose the best methods for effective solutions and restoring our plane’s integrity.